This post may contain affiliate links. Please read our disclosure policy.
Grinch Cookies are fun and festive iced thumbprint cookies, with colorful candy centers and a bright red Grinch’s heart, signifying how it grew 3 sizes.
For another holiday treat, try my 7 Layer Cranberry Chocolate Magic Bars next!

For more yummy Christmas cookies, try our Candy Cane Cookies, festive Butter Cookies, and Red Velvet Cookie.
One of my favorite types of cookies is Thumbprint Cookies. You can fill them with jam or jelly, chocolate fudge, or icing. I chose icing for my Thumbprint Grinch cookies because I found these bright neon green candy melts and knew they’d be perfect.
The cookies take just a few minutes to make and less than 10 minutes to bake. Then you just melt the candy down with a little vegetable oil to help make it smooth and shiny, and pipe it into the center of the cookie.
They are not only delicious but adorable, too. Grinch cookies are great for packaging up as gifts or for adding some fun to your cookie tray.
Why We Love Grinch Cookies
- Easy to make with just a few ingredients.
- Fun and festive – they remind of of the film and how the Grinch’s heart grew as he learned the true meaning of Christmas.
- Kids can help with the thumbprints!
Ingredients for Grinch Cookies
- Butter – I prefer unsalted for baking, but if you don’t have any on hand, regular, salted butter will work. Just be sure to cut the added salt from the recipe.
- Sugar
- Egg Yolks – Using just the yolks adds richness to the cookies.
- Salt – Omit if using salted butter, or just add a pinch.
- Vanilla Extract – to balance flavors.
- All-Purpose Flour – This is what will bind the cookie dough together. There is no baking powder or baking soda in this recipe. This cookie is dense and thick, perfect for holding the chocolate.
- 12 ounces Neon Green Candy Melts – You can find this at craft stores, or on Amazon.
- Vegetable Oil – Used to melt with the candy to give a smooth and shiny finish.
- Large Red Heart Sprinkles – You need these to add the Grinch’s heart to the center of the cookie. They are adorable, but can be a little pricey; at least you know you get enough to use for a few recipes! Check local craft stores or find on Amazon.
How To Make Grinch Cookies
Make the dough. Cream together the butter and sugar, then add egg yolks, vanilla, and salt. Finally the flour is added and just mixed until it’s combined. The dough will be crumbly. You will still need to scoop and roll the dough, so be sure to have a light hand with the mixing.
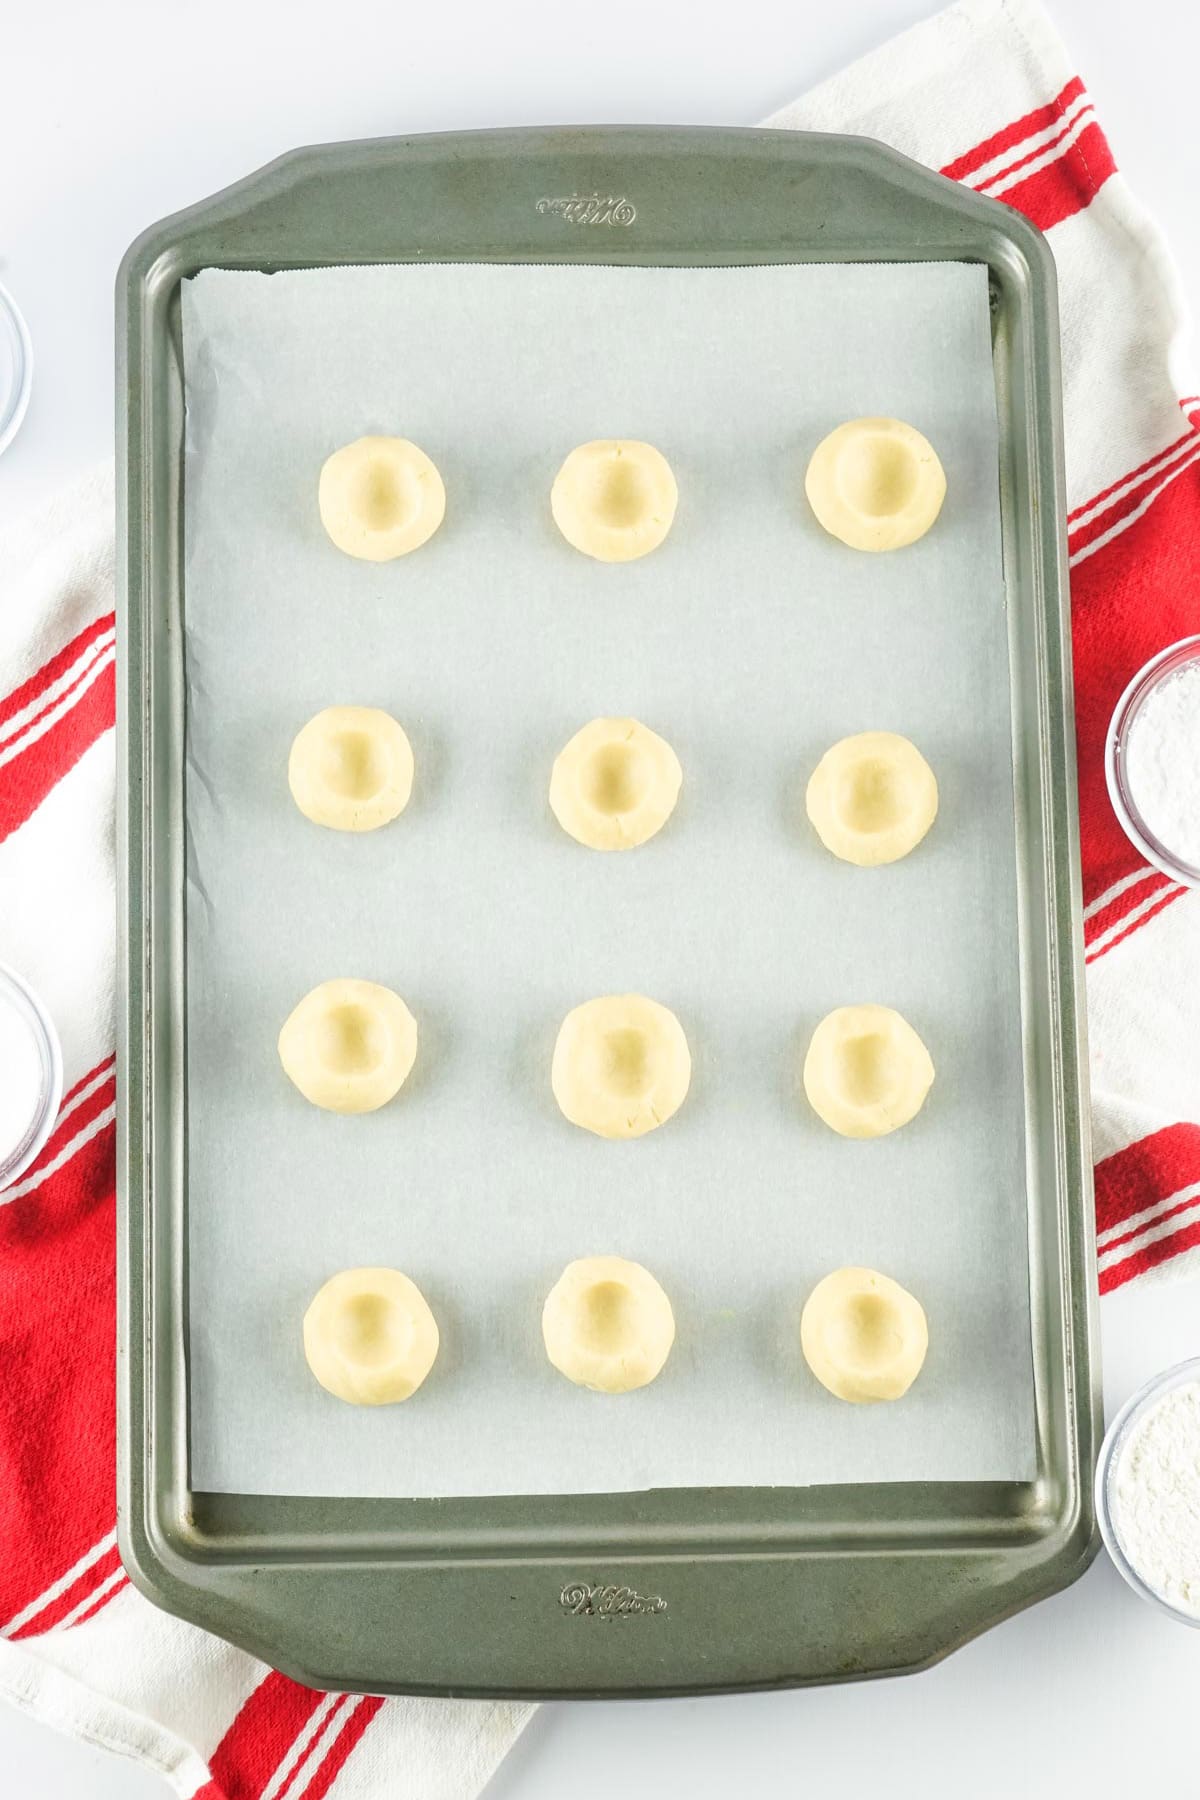
Shape the dough. Using a cookie scoop, portion out dough balls about and roll balls about 1-inch wide. Arrange cookie dough balls on a parchments paper lined baking sheet and use your thumb to make a deep indent. You could also use the back of a ¼ teaspoon. Bake until lightly browned, then set aside to cool while you melt the candy.
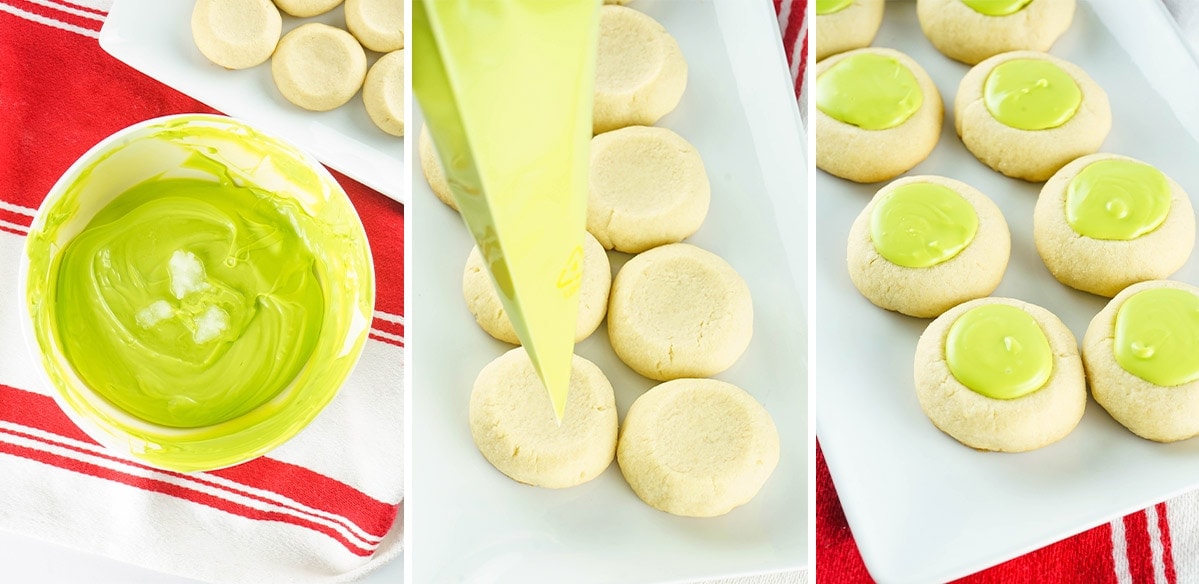
Make the filling. Pour the candy melts into a medium bowl and melt in the microwave with about a tablespoon of vegetable oil. Microwave on high at 20-30 second intervals until completely smooth. Fill a piping bag and cut off the tip, then gently fill each thumbprint with melted chocolate. Add the red candy heart quickly before the chocolate sets and let it sink down.
FAQs
A tray of cookie dough will take about 8 minutes to bake. You can bake two trays at once, if you have a convection oven or if you swap racks about halfway through. Since you can put the cookies pretty close together on the tray, you should be able to bake the whole batch in one shift.
After – if you fill them prior to baking, the filling will just melt and make a big mess.

Storage
Storage: Store cookies in a cool place but at room temperature in an airtight container for up to a week.
Freezing: You can freeze the cookies for up to 3 months, and thaw when you’re ready to enjoy. Keep in mind that chocolate tends to sweat in the fridge or freezer, so the red candy heart may sweat on the chocolate filling or the cookie.
Expert Tips
- If your chocolate is pretty thick and “gloppy” add more coconut oil a little bit at a time until the desired consistency is met.
- If you’re having trouble with your cookies cracking as you make the thumbprints, reroll them to make the outside of the ball moist again and then retry the divet. If you want to make the cookies bigger, go for it! These cookies are about 2 inches in size. Just note that you might need to cook them longer.
- Don’t try to adjust the chocolate once it’s set on the cookies for 60 seconds or longer. If not, they won’t be smooth and they’ll look messy. I learned this the hard way.
- When adding the chocolate to the cookies, if you want/need to adjust the chocolate a bit, use a toothpick as you’re decorating, but don’t try to change it after it’s set, as stated above.
- Don’t push the heart sprinkles into the chocolate, just placing them on the cookie will make them stick once hardened.
- Don’t make your cut tip too big on the frosting bag or it will come out on its own and make it hard to decorate the cookies without making a mess.

More Christmas Cookie Recipes You’ll Love
- Oatmeal Kiss Cookies (Blossoms)
- Chocolate Crinkle Cookies
- Cowboy Cookies
- Eggnog Cookies (Meltaways)
- Rocky Road Cookies
- Ricotta Cookies

Iced Thumbprint Grinch Cookies
Ingredients
- 1 cup unsalted butter room temperature
- ⅔ cup sugar
- 2 large egg yolks
- ½ teaspoon salt
- 1 tablespoon vanilla extract
- 2 cups flour
- 12 ounces neon green candy melts
- large red heart sprinkles
Instructions
- Preheat the oven to 350 degrees and line 1-2 standard baking sheets with parchment paper.
- In the large mixing bowl, cream together the butter and sugar, using a hand mixer. Beat for 1 minute, then add in the eggs, salt, and vanilla. Beat for another minute.
- Add in the flour and continue to use the mixer until the dough turns crumbly. Switch and knead with your hands until the mixture can clump into a ball.
- Roll the dough into about ½-inch balls or about 1 tablespoon worth of dough, and line them on the sheet. You don’t need much room between them, so about half an inch should do the trick.
- Using your thumb or the back of a ¼ teaspoon, make a deep print in the middle of each ball.
- Bake for 8-10 minutes or until very lightly golden brown on the bottoms. Allow to cool completely on the pan.
- Place the candy melts into a medium bowl and microwave for about 3 minutes or until smooth and creamy. Stir every 30 seconds during this process.
- Place the melted chocolate in a frosting bag and snip a small tip off with the scissors.
- Fill each cookie cavity with the chocolate by filling the middle first and working around the edges in a circular motion.
- Give each cookie a light tap to ensure the chocolate flattens out and is smooth.
- Immediately place a red heart sprinkle in the middle of the chocolate.
- Chill for about 5 minutes or until hardened. Enjoy!
Nutrition
Nutritional Disclaimer Kristin Maxwell of “Yellow Bliss Road” is not a dietician or nutritionist, and any nutritional information shared is an estimate. For accurate calorie counts and other nutritional values, we recommend running the ingredients through your preferred online nutritional calculator. Calories and other nutritional values can vary depending on which brands were used.
