This post may contain affiliate links. Please read our disclosure policy.
Cheese scones are tender, easy to make, and great to eat any time of the day! Serve scones as an afternoon snack or alongside a soup or stew for dinner. You can even freeze them to enjoy later!

It may seem a little intimidating to make scones from scratch, but I promise you it’s actually really easy! Cheese scones are great for serving with your favorite warm comfort food dishes, like Easy Crockpot Chili, Homemade Chicken Soup or for breakfast with some fried eggs and Crispy Air Fryer Bacon.
Why We Love These Cheese Scones
- Tender, Light, and Fluffy – These scones have the best texture!
- Perfect all day long – Scones are a great option from breakfast, snack, dinner.
- Extra Cheesy – By not only mixing cheese into the dough, but also sprinkling on top of the scones these are perfect for cheese lovers!
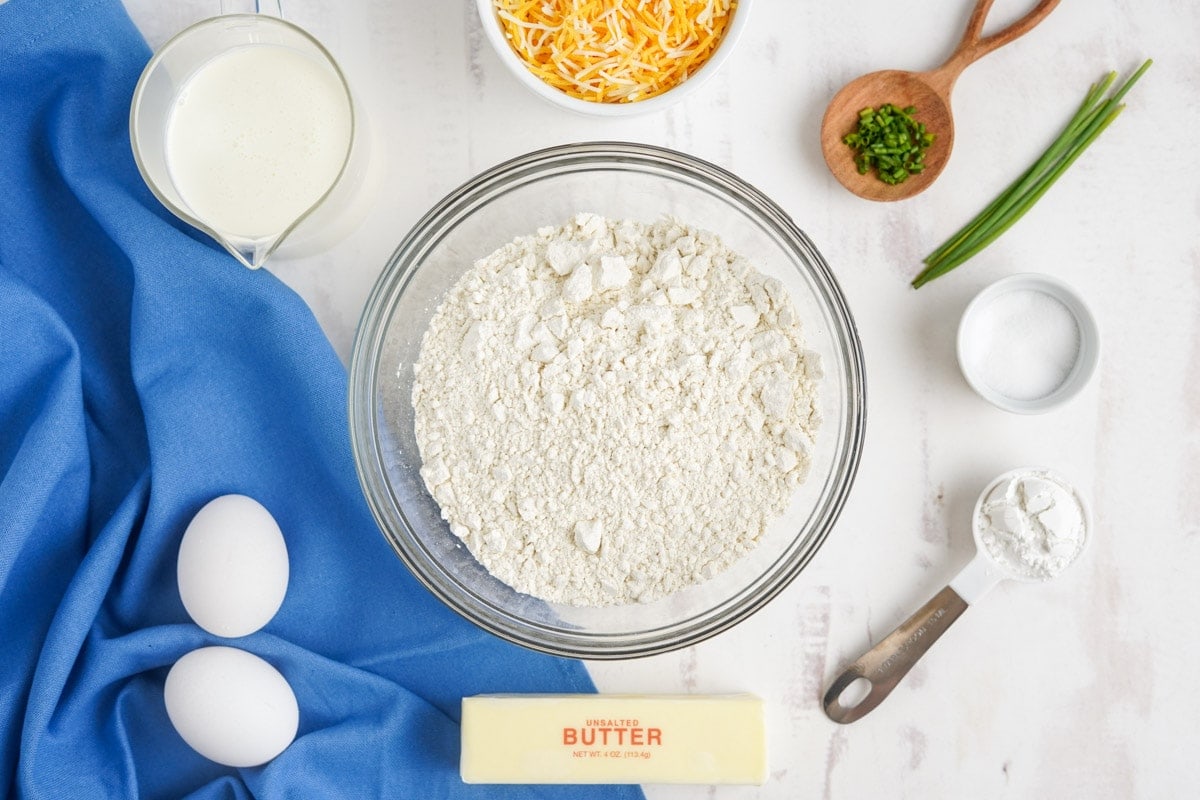
Ingredients for Cheese Scones
- All Purpose Flour
- Baking Powder – to help the scones rise nice and fluffy.
- Salt
- Unsalted Butter – you want your butter to be cold.
- Eggs
- Cream – you can use a bit more cream as needed to get the texture right.
- Shredded Cheese – I like to use a blend of both yellow and white cheddar.
- For Serving – fresh chives and butter.
How to Make Them
The key to super tender scones is to not overwork the dough. Follow these easy steps and tips for perfect scones every time.
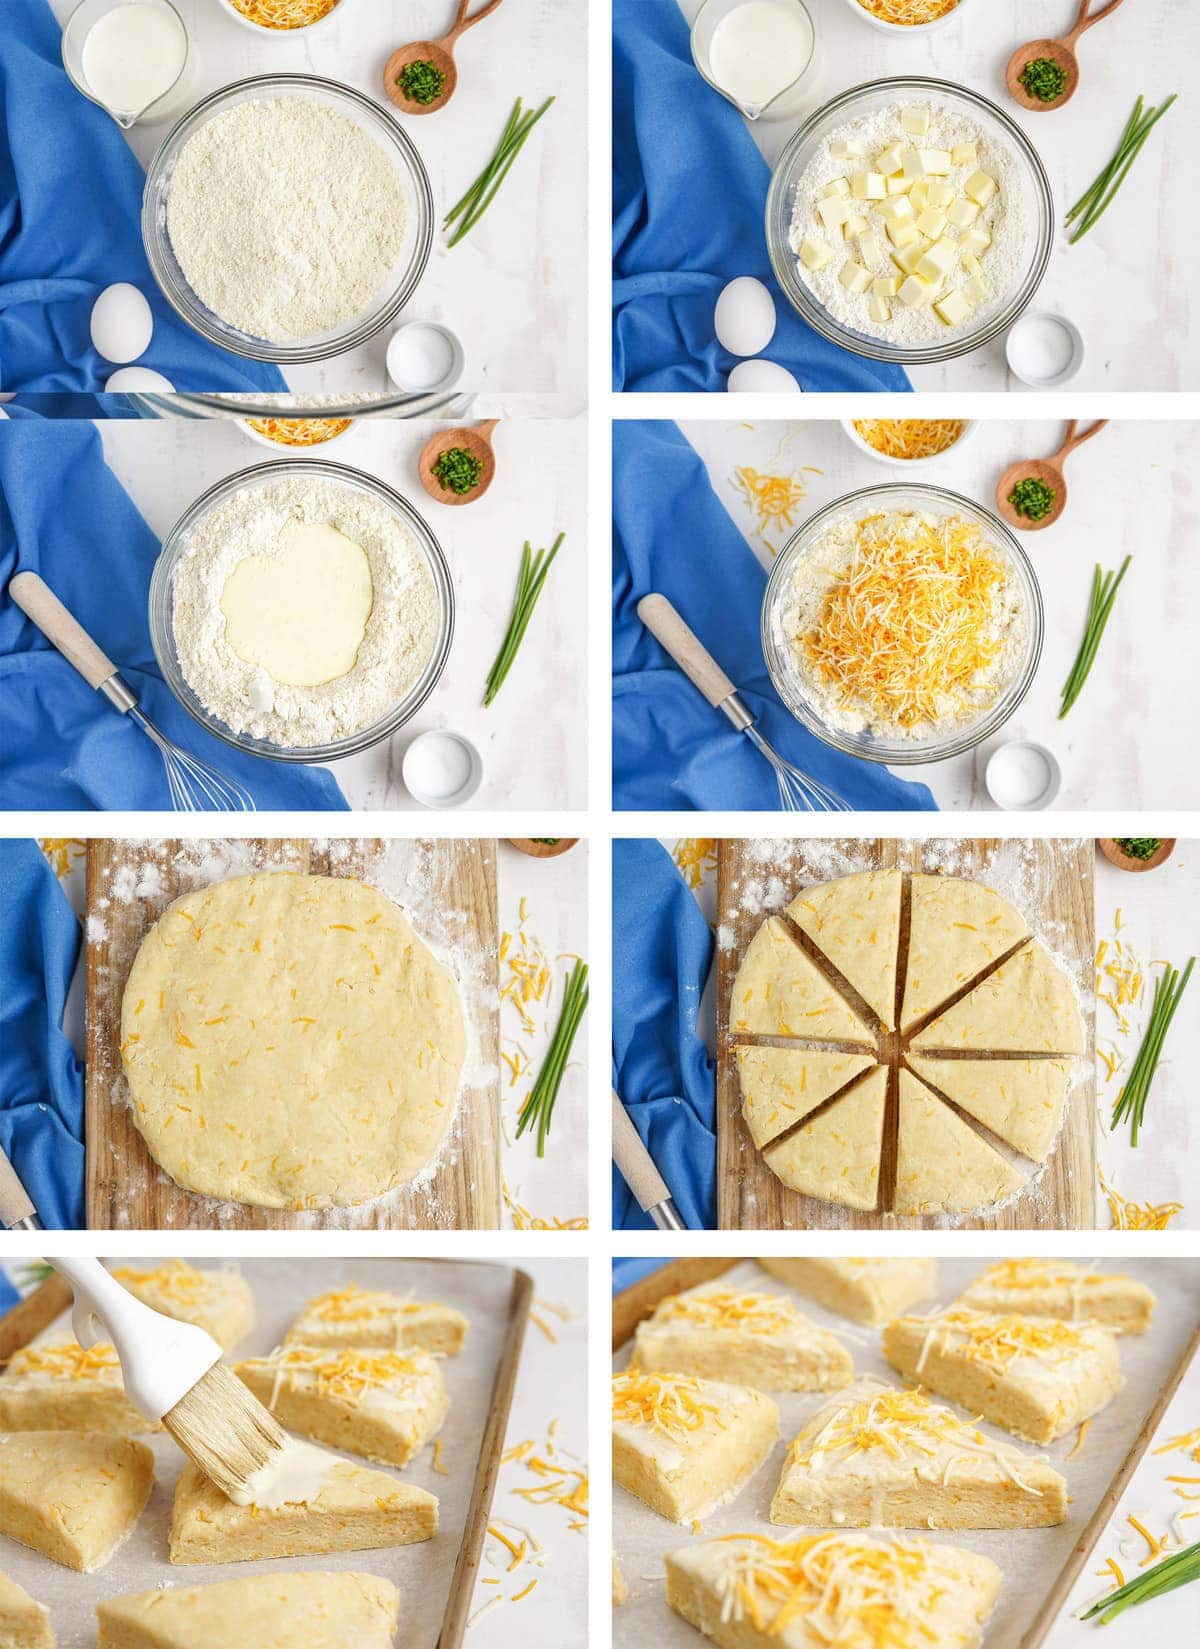
- Prep. Start by preheating the oven to 400°F and line a baking sheet with parchment paper.
- Mix dry ingredients and cut in butter. In a large bowl, whisk together the dry ingredients (flour, baking powder, and salt). Cut in the cold butter chunks using a pastry cutter, your hands, or a food processor. It should resemble fine breadcrumbs.
- Add wet ingredients – In a small bowl, mix together the eggs and cream until combined – set aside 2 tablespoons of the mixture to brush on top. Next make a well in the center of the flour mixture, add the egg mixture, and fold until just combined.
- Add cheese – Fold in the shredded cheese, but reserve about a half cup to top the scones.
- Form scones – Gently press the dough into an 8 inch circle and cut into 8 triangle slices. Arrange the scones on the prepared baking sheet, brush with the reserved egg mixture, and sprinkle with cheese.
- Bake – Now just bake the scones in the preheated oven for 15-20 minutes until lightly golden. Serve warm sprinkled with fresh chives and melted butter.

FAQs
Scones and biscuits are served in similar ways but their texture is quite different. While a biscuit is flaky and buttery, a scone is denser and has a crunchier exterior.
There are two main secrets to making perfect scones. 1.) Start with cold ingredients. 2.) Don’t overwork the dough. By doing both of these things, you’ll have scones that are light and tender vs tough.
How to Serve
These savory scones can be served any time of day! Add them to your breakfast spread alongside baked egg muffins or a goat cheese fritatta. Or serve the scones at dinner with a simple beef stew or slow cooker chicken stew.

Storage, Reheating, and Freezing
Storage – Leftover scones can be stored at room temperature in an airtight container for about 2 days. Or you can freeze baked scones in a freezer bag for up to 3 months.
Reheating – Leftover scones can be eaten at room temperature or you can warm them up in a 350 degrees F oven for a few minutes to refresh them.
Freezing – You can freeze the scones before baking to enjoy fresh scones anytime! Flash freeze the unbaked scones on a baking sheet and then transfer to a freezer bag for up to 2 months. Remove the frozen scones from the freezer for about 20 minutes while you preheat the oven and bake like normal, but you will need to add up to 5 minutes on to the bake time.
- Cut into your preferred shape – While scones are often cut into triangles, you can make squares or even circle scones using a biscuit cutter.
- Don’t overmix – It’s very important to not overmix scone dough as this can cause them to be chewy. I recommend mixing up by hand instead of using an electric mixer.
- Cut in the butter – You can cut in the butter by hand using a pastry cutter or a fork, or for quick work you can use a food processor to cut the butter into the flour.
- Use COLD ingredients – It’s best to use both cold butter and cold milk when making scones. Similar to when you make a pie crust – using cold ingredients helps give flaky, tender scones.

More Easy Baking Recipes You’ll Love
- Cranberry Orange Scones
- Lemon Blueberry Scones
- Easy Drop Biscuits
- Garlic Cheese Biscuits
- Beer Bread Recipe
- Homemade Garlic Breadsticks

Cheese Scones
Ingredients
- 2 ½ cups all purpose flour
- 1 tablespoon baking powder
- ½ teaspoon salt
- ½ cup cold unsalted butter cut into small cubes
- 2 eggs lightly beaten
- 1 cup cream plus a few tablespoons more if needed
- 1 ½ cup shredded yellow and white cheddar cheese blend
- Optional: fresh chives and butter for serving
Instructions
- Preheat the oven to 400 degrees F and prepare a baking sheet by lining with parchment paper.
- In a large bowl, whisk together the flour, baking powder and salt.
- Using a pastry cutter, your hands or a food processor cut the cold butter into the flour until it resembles fine breadcrumbs.
- Make a well in the center of the flour mixture and set aside.
- In a small bowl, combine the eggs and cream until fully mixed. Set aside ⅛ of a cup of the mixture to brush the top of the scones before baking.
- Pour the egg and cream mixture into the dry ingredient well and gently fold just until combined.
- When the mixture is almost fully incorporated, fold in 1 cup of the shredded cheese. Reserve remaining ½ cup of cheese to top the scones.
- Gently form into an 8 inch circle and cut into 8 slices. Place the slices onto the prepared baking sheet.
- Brush the reserved egg and cream mixture over the scones and sprinkle the remaining shredded cheese on top.
- Bake in the preheated oven for 15-20 minutes or until the tops begin to get a golden hue.
- Serve warm from the oven. Top with fresh chives and melted butter if desired.
Notes
Nutrition
Nutritional Disclaimer Kristin Maxwell of “Yellow Bliss Road” is not a dietician or nutritionist, and any nutritional information shared is an estimate. For accurate calorie counts and other nutritional values, we recommend running the ingredients through your preferred online nutritional calculator. Calories and other nutritional values can vary depending on which brands were used.


